
Before you create an account with PAY. you need to establish the following two things:
1. The package you want to use
Your package choice depends on the payment method you want to use, the number of transactions you expect, and the features you wish to use. Pay.nl offers the following 4 packages:
- Pioneer package
- Professional package
- Business package
- Corporate package
Need help choosing a package?
Take a look at a comprehensive overview of the various software packages
2. The integration method you want to useThe payment solution of PAY. can be linked to your sales location in different ways. Using a:
- Plugin
- Payment link
- Donation link
- SDK for developers
- API for developers
- PAY.APP or CashBoard
-
Need help choosing an integration method?
Take a look at a comprehensive overview of the various integration methods
Steps list
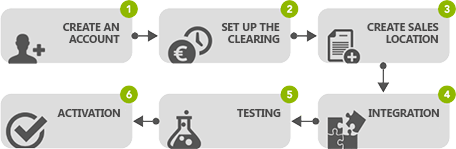
After you have decided which package and which integration method you want to use, we can proceed with the first step: Creating an account. Before you can receive your first live payment you need to complete the following steps Figure: Steps list
The steps are described briefly and contain a link to a more extensive explanation, if applicable.
1. Merchant registration
Creating an account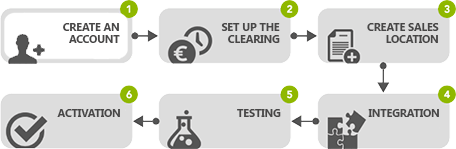
https://www.pay.nl/registreren The registration process consists of 6 easy steps:
- Step 1: Country of registration
- Step 2: Company data
- Step 3: Personal data
- Step 4: Your sales locations
- Step 5: Package choice
- Step 6: Completion
After you have completed these steps successfully, you will receive an e-mail with the confirmation of your registration. In the meantime, PAY. has set up the following for you:
- A personal account has been created with your user data.
- A merchant (business) account has been created based on the selected package.
- The two accounts have been linked to each other. This allows you to log on to your merchant account with your personal account.
- The required documents have been created for you based on the authorised signatories you have specified in step 6.
- A sales location has been created for you based on the data in step 4.
Need help with your registration?
Take a look at a step-by-step overview of the registration process.
2. Create sales location
Create sales locatio 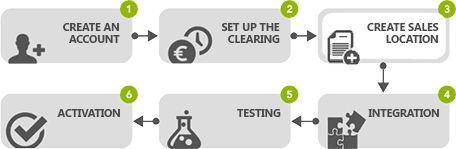
During registration PAY. has already created a sales location for you based on the data entered in step 4 of the registration process. We are now going to view the sales location, and make changes if necessary.
View sales location
- In the Admin Panel, go to the tab
Sales Locationshttps://my.pay.nl/programs/programs. - Click on the 'Change' link in the Options column. This will take you to a panel where you can view and change the settings for the relevant sales location.
- General informati
Here you can view and change thename of the sales locationand thePublication / URLThe fieldcategorycannot be changed by you. If you want to change the category, please contact your account manager. - Module
Here you can find the way in which the PAY. payment platform is linked to your sales location, for example by means of a plugin or your own implementation. The fieldsModuleandLinked viacannot be changed. You can change the description of your sales location. - Payment options
The payment options that you can select depend on your package and on the category for your sales location. For example, the free Pioneer package does not include a credit card, and Fashion cheque is only shown as a payment method if your sales location belongs to a fashion-related category. Select the checkbox for a payment method you wish to offer to your customers. An overview of all available payment methods can be found in our payment methods documentation - Communicatie URL
A communication URL is a URL that contains a script for receiving notifications from our servers. With all payment types, our servers issue notifications to you regarding the status of the payment, for example to indicate that an iDEAL payment has been completed successfully. For the fieldSet exchangeyou can select the following 3 options:
No, do not use a communication URL
Select this option if you use your own implementation and have already set the communication URL via the API, to prevent your communication URL from being called twice.
-
Yes, use custom communication URL
If you use your own implementation and have not set the communication URL via the API, you can enter your communication URL here.
-
Yes, via API in plugin
Select this option if you use a standard plugin. The plugin handles the communication between your server and the PAY. payment platform.
The communication URL may be referred to in e-commerce systems using different terms: exchange URL, webhook URL or IPN URL.
- Notifications
Do you wish to receive an e-mail after every successful payment? If so, in the section notifications add one or more e-mail addresses in the fieldExtra email adress.
No sales location shown?
Is your sales location overview empty or do you want to add a second sales location? You can easily do this yourself
Need help with your sales location?
This step-by-step overview explains all settings for a sales location.
3. Integration
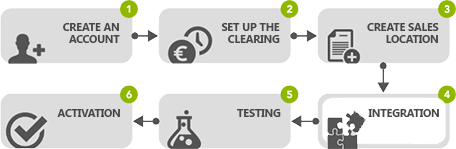
Your sales location has now been set correctly and we can now link it using your preferred integration method:
- Plugin
PAY. supports dozens of e-commerce systems for which plugins and hosted solutions are available. For each plugin the plugin documentation contains a step-by-step manual to create the link between PAY. and your webshop. - Payment link
Will you be using payment links? PAY. offers the possibility to use one-time payment links and dynamic payment links. - Donation link
Will you be using donation links? PAY. offers a ready-to-use donations module. Information about the use of this module can be found here. - PAY. SDK and APIs
If you are going to use the PAY. SDK or APIs you are taking care of the link between our platform and your webshop or sales location yourself. Information about this can be found in our developer documentation.
4. Testing
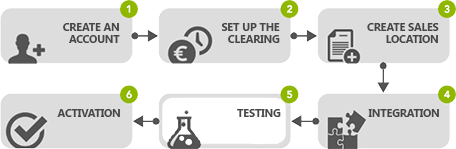
After your sales location has been successfully integrated it is time for the first test transaction. Pay.nl offers the possibility to set a sales location in test mode. This will allow you to easily test all functions of your webshop / website by simulating an actual payment.
Setting test mode
- In the Admin Panel, go to the tab
Sales Locationshttps://my.pay.nl/programs/programs. - Click on
Live, payments activein theModecolumn to set the relevant sales location in the test mode. - Now, make a transaction via your webshop / website and choose a payment method to pay for the order. You will now be directed to the test payment panel of Pay.nl.
- To simulate a payment, enter your API Token in the panel and click on the 'Start payment’ button. An API Token consists of 40 characters and is displayed in the sales location overview by clicking on the link
Detailsin theOptionscolumn.
Need help setting the test mode?
This detailed overview shows you how to set the test mode.
View test transaction
The test transaction you carried out can be found in the Pay.nl Admin Panel.
- In the Admin Panel, go to the tab
Transactions»Total overviewhttps://my.pay.nl/transactions. - The test transaction should be listed with the payment profile
SandBox. TheStatuscolumn indicates if the transaction was completed successfully.
Need help viewing a transaction?
This step-by-step overview explains all the transaction details.
5. Activation
Activate sales location 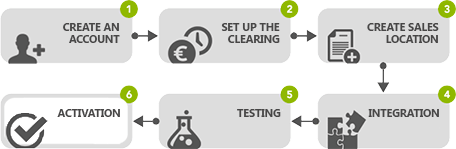
If the sales location has been successfully tested, the sales location can go live. End users will not be directed to the test payment panel (SandBox) of Pay.nl, but to the payment panel of the selected payment option.
Making the sales location go live
Your sales location is still in test mode. Use these steps to make your sales location go live:
- In the Admin Panel, go to the tab
Sales Locationshttps://my.pay.nl/programs/programs. - Click on
Test modein theModecolumn to set the relevant sales location in the live mode.
Required documents
Congratulations! From now on you can receive payments for your webshop or sales location. But we can only pay out your accrued balance after we have received and approved all required documents.
The documents we need from you depend on your package and the legal status of your company. You can find a list of the required documents here:
- In the Admin Panel, go to the tab
Merchant»Companyhttps://my.pay.nl/my_merchant. - At the top of the screen you will find an overview of all the necessary documents and a link for downloading or uploading the documents.
Need help with providing the required documents?
In this overview the various documents are discussed in detail.
6. Additional options
At this point you have successfully created a link between the PAY. payment platform and your webshop or sales location. You may even already have received your first real payment. But PAY. has much more to offer. Here is an overview of options that may be of interest to you.
1. Refunding a transaction
Sooner or later it will happen to every Merchant that a payment needs to be refunded to your customer. In PAY., you can do this with a few clicks, either via the Admin Panel or via the mobile app.
| Package | Available from the Pioneer package. |
| Manual | ✔️ Available |
2. Dashboard
The Dashboard offers a convenient overview of statistical payment information, including the latest transactions and clearings, day and week comparisons, and a search function.
| Package | Available from the Pioneer package. The payment mix statistics and the comparison graphs are available in a Professional or Business package. |
| Manual | ✔️ Available |
3. Create a custom payment link
Via our Admin Panel or via the smartphone app, you can generate a unique one-time payment link for a customer, in which you can specify the amount, the expiry period, a description, and the Sales location for which the payment is intended. If required, you can send the generated payment link directly to your customer via our system.
| Package | Available from the Pioneer package. |
| Manual | ✔️Available |
4. Setting up second chance
Every webshop owner will be familiar with this: Cancelled payments, and customers who at the last moment decide not to order. Wouldn't it be great if you could give your customer a second chance to make the payment? This is possible with the feature second chance of PAY.
| Package | Available from the Pioneer package. |
| Manual | ✔️Available |
5. Setting the iDEAL backup plan
Via the PAY. iDEAL backup plan you can offer your customers an alternative way of paying if iDEAL or the bank preferred by the customer is not available.
| Package | Available from the Pioneer package. |
| Manual | ✔️Available |
6. Protecting your account
By default, you always log in with your user name and password. Would you prefer additional security for your personal account? PAY. offers validation options via text messages, Google Authenticator and forced IP validation.
| Package | Available from the Pioneer package. |
| Manual | ✔️Available |
7. Maximum statistical insight
Insightful statistics are of crucial importance to your business. Of course, you will receive an overview of paid transactions with many information fields. Via management reports you can view the turnover for past periods, by Sales Location or by payment method. Clients with a Business package or higher receive trend reports, allowing you to measure increases or decreases in particular activities.
| Package | Available from the Pioneer package. Statistics trends require a Professional package |
| Manual | ✔️Available |
8. Accept credit card payments
From the Professional package you can accept credit card payments. At this moment we support VISA, Mastercard, Postepay, Carte Bleue, Nexi, Dankort and American Express credit cards.
| Package | Available from the Professional package. |
| Manual | ✔️Available |
9. Use direct debit
Direct Debit is a payment option that automatically debits amounts from the customer’s bank account. This is possible on a recurring basis (subscription) or for a one-time payment. You can easily add manual direct debit payments via the Admin Panel. Do you want to automate the process? You can use an SDK or API. Direct debit payment is supported by the Professional package and higher.
| Package | Available from the Professional package. |
| Manual | ✔️Available |
10. Using trade names
By default, payments to you by your customers made through our system are paid to 'Stichting Pay inzake Your Company Name'. If you have the Professional package of higher, you can add a trade name as your public name. This trade name will then be used everywhere in the system (instead of your company name), with every payment, refund, and information request.
| Package | Available from the Professional package. |
| Manual | ✔️Available |
11. Adding employees and rights
Do you want more than one person to have access to the merchant account? This is possible from the Professional package. You can set the user rights per employee. For example, you can create an account for your web builder, that does not provide access to your financial information.
| Package | Available from the Professional package. |
| Manual | ✔️Available |
12. Clearing to several bank accounts
From the Business package, you have the possibility to have you Balance cleared to different bank account numbers. For each Sales Category that uses our payment solutions you can add an account.
| Package | Available from the Business package. |
| Manual | ✔️Available |
13. PAY. APP
View and refund transactions, view the turnover for the last couple of days, or send a payment link. All this is possible via the PAY. APP for Android and iPhone.
| Package | Available from the Pioneer package. The options 'Pay with credit card' and 'Receive push message after transaction' require a Professional package. |
| Manual | ✔️Available |
7. Setting clearing
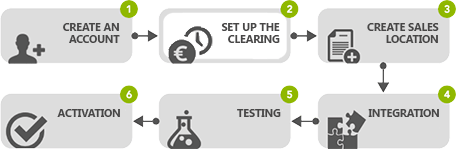

After successful registration with Pay.nl you can log in to the Pay.nl Admin Panel . Use your personal account date (e-mail address and password) for logging in. When you are logged in, we are going to set how often you want your credit balance to be transferred to your bank account (this is called the clearing frequency).
Setting the clearing frequency
- In the Admin Panel, go to the tab
Merchant»Invoiceshttps://my.pay.nl/balance. - The settings contain the field
Clearing frequencywith the following options:Daily
We check every working day if there is a credit balance for you. If so, we will perform a clearing.Weekly
We check every week if there is a credit balance for you. If so, we will perform a clearing.Monthly
We check on the first working day of every month if there is a credit balance for you. If so, we will perform a clearing.
- • Select the desired clearing frequency and click on the 'Save' button at the bottom of the page to set the clearing frequency.
Other settings
In addition to the clearing frequency, on this page you can change the settings for the options Booking period and Clearing from. Almost all merchants use the default values Month and Direct. Detailed information on these two fields can be found here.
Need help with your settings?
Take a look at a step-by-step overview of the setting process for clearing.